Subscription Tracking
Subscription tracking means maintaining a current list of every recurring charge, the service behind it, and the next renewal date. People often miss items because the charge appears under a different merchant name than the app name, or because the subscription is billed through a third party. A practical starting point is your last 2–3 months of card or bank transactions, then cross-check each recurring line item against your email receipts and account pages.
In the U.S., the Federal Trade Commission has long advised consumers to review billing statements and cancel directly with the provider when possible. That guidance matters because chargebacks and disputes can be slower than a cancellation, and some services continue access until the end of the billing period. Many banks also label recurring payments as “recurring” or “scheduled,” but the label is not universal.
Why Subscriptions Get Lost
Most tracking failures come from mismatched identifiers. A streaming app might bill as “PAYMENTS VENDOR LLC,” while the account shows the app name, and the difference hides the subscription during a quick scan. Another common issue is multiple subscriptions that look similar, such as a family plan plus an individual add-on, which can create duplicate access.
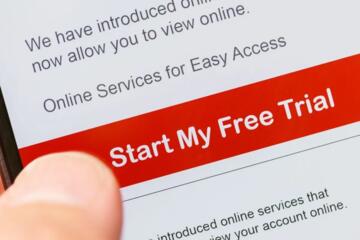
People also confuse “free trial” with “no cost.” Trials often convert automatically after a set period, and the conversion date can differ from the signup date if the provider delays activation. The biological mechanism here is not about the body; the mechanism is behavioral: repeated small charges create low salience, so attention drops after the first month, and the brain treats the expense as background noise.
Skip the “delete the app” idea. It rarely cancels billing.
Build A Subscription Inventory
Start With Your Transaction History
Pull your last 60–90 days of card and bank transactions and filter for recurring charges. Many statements show “recurring” tags, but you should still verify because tags can miss annual plans. In practice, you’ll copy the merchant name, amount, and date into your inventory, then group identical amounts that recur monthly.
Why it works: recurring charges are the ground truth for what you paid. It looks like a list of merchant lines that repeat on a schedule, such as $9.99 every 30 days. A mild frustration is that some merchants bundle multiple services into one line item, which forces you to cross-check receipts.
Use 2 months minimum. Then you see patterns.
Cross-Check Email Receipts
Search your email for keywords like “receipt,” “invoice,” “subscription,” and the service name. Receipts often include the billing period, renewal date, and the last four digits of the payment method. In practice, you’ll link each transaction to a receipt, then record the renewal date from the receipt rather than guessing.
Why it works: receipts usually contain the provider’s internal billing schedule, which your bank statement may not show clearly. It looks like a row in your spreadsheet that now has a specific “renews on” date. If you use Gmail, you can search for “subject:receipt subscription” and narrow by sender domain.
Save receipts in one folder. Then search stays fast.
Record The Cancellation Evidence
When you cancel, capture proof: a confirmation email, a cancellation number, or a screenshot of the account page showing “canceled” and the end date. Some providers show “access until” a specific date, which you should record so you don’t panic when the service remains active for a short period. In practice, you’ll add a “canceled on” date and an “access ends on” date to your inventory.
Why it works: cancellation evidence reduces the chance of reactivation confusion and helps you respond quickly if a charge still posts. It looks like a paper trail you can find in under 30 seconds. If you cancel on a mobile app, check the web account too, because the app UI sometimes lags behind the account status.
Skip “I canceled” notes. They vanish later.
Use A Renewal Calendar With Alerts
Transfer renewal dates into a calendar and set alerts 7 and 1 days before renewal. If you track 20 subscriptions, you’ll likely get 40 alerts per year, which is manageable if you keep the list accurate. In practice, you’ll create a dedicated calendar named “Subscriptions” and add events with the service name and expected amount.
Why it works: alerts convert passive tracking into an action window. It looks like a reminder that says “Review and cancel if needed: Service X, renews 2026-09-03.” A small aside: I’ve seen people set alerts only on the renewal day, then miss the provider’s cancellation cutoff.
Set two alerts. One day is tight.
Choose One Tracking Tool, Not Five
You can track subscriptions in a spreadsheet, a password manager’s notes, a dedicated budgeting app, or a personal finance tool. Pick one system as the “source of truth” and treat the others as read-only views. In practice, you’ll update the source of truth after each cancellation and after each new recurring charge appears.
Why it works: multiple systems create conflicting lists, and you end up trusting the wrong one. It looks like a single row per subscription in your master sheet, with links to receipts and cancellation evidence. If you use a password manager, store cancellation emails as attachments in a secure vault, but keep the renewal date in the master list.
One source of truth. Less mental load.
Case Examples For Real Life
Example: The App That Kept Charging
A person deleted a fitness app after a trial ended, then noticed a recurring charge under a merchant name that did not match the app. The inventory process started by pulling 90 days of transactions, which revealed a monthly charge at $14.99. Cross-checking email receipts found a “subscription renewal” email with a renewal date and a cancellation link. They canceled inside the app store account, saved the confirmation email, and updated the inventory row with “canceled on” and “access ends on.”
Skip the app deletion. It rarely cancels billing.
Example: Two Services With Similar Names
Another person tracked a streaming service by searching only for the service name in email. They missed a second subscription because the merchant descriptor matched a different vendor and the email subject used a generic phrase. The fix came from grouping recurring transactions by amount and frequency, then checking each group against account pages. They ended up with two rows in the inventory: one for the base plan and one for an add-on billed separately, each with its own renewal date.
Grouping by amount helps. Then names stop misleading.
Checklist And Comparison
Use this decision support to choose a tracking method that matches your habits and tolerance for maintenance.
| Method | Best For | Maintenance Time | Main Risk |
|---|---|---|---|
| Spreadsheet inventory | People who want control and audit trails | ~30–60 min weekly | Forgetting to update after cancellations |
| Bank recurring labels | People who want minimal setup | ~10–20 min monthly | Missing annual plans and descriptor changes |
| Account-page review | People with few services | ~15–30 min per provider | Time cost grows with 10+ subscriptions |
| Receipt-driven tracking | People who keep email organized | ~20–40 min monthly | Missing receipts in spam or old inboxes |
Step-by-step checklist:
- Export 60–90 days of transactions and list recurring lines.
- For each line, find the matching receipt or account page.
- Record renewal date and expected amount in one master list.
- Add calendar alerts 7 and 1 days before renewal.
- After each billing, verify the posted amount and save the receipt.
- When canceling, store confirmation evidence and update the row.
Keep the list current. That’s the whole point.
Common Mistakes To Avoid
One mistake is tracking only what you recognize. If you only list services you remember signing up for, you miss trials, add-ons, and family-plan members. Another mistake is relying on a single identifier like the merchant name; descriptors change, and the same subscription can appear under a new string.
Another failure mode is canceling without recording the end date. Some providers keep access until the end of the billing period, and the charge can still post even after you canceled. If you don’t record “access ends on,” you might re-subscribe out of confusion, which defeats the tracking effort.
Skip “cancel then forget.” It backfires.
People also over-trust automation. If you use a tool that imports transactions, check that it maps the right merchant to the right service. Some tools misclassify payments when the merchant descriptor is generic, and the error can persist until you notice it.
FAQ
How do I find hidden subscriptions?
Review 60–90 days of transactions for recurring patterns, then match each merchant line to receipts or account pages. Descriptor changes happen, so search by amount and frequency when names do not match.
What should I record for each subscription?
Record merchant name, service name, billing frequency, expected amount, renewal date, cancellation status, and a link or copy of the receipt or confirmation email.
Do I need to check app store subscriptions separately?
Yes. App store subscriptions are managed in the store account, while web subscriptions are managed on the provider’s website, so canceling in one place does not cancel the other.
How fast should I verify a new charge?
Verify within 7 days of the charge posting. If the amount differs, check the provider account first, then contact support with the receipt details.
What if I canceled but the charge still posted?
Check the receipt and account status for “access until” dates. Many cancellations stop future renewals but do not reverse the current billing period.
Author's Insight
Subscription tracking works best when it treats bank transactions as the starting dataset and provider receipts as the verification dataset. That approach reduces reliance on memory and avoids the common mismatch between app names and merchant descriptors. A practical habit is to update the master list right after any cancellation, because the renewal date is the only field that drives future action. I also recommend testing your workflow once—on a single subscription—before you scale it to 20+ services, because small mapping errors compound.
Key Takeaways
Start with your last 60–90 days of recurring transactions, then cross-check receipts or account pages to capture renewal dates and expected amounts. Use one master list, add calendar alerts 7 and 1 days before renewal, and verify posted charges within 7 days. Save cancellation evidence so you can interpret “access until” dates correctly. This process reduces surprise charges, but it cannot prevent every billing error; if you see repeated incorrect charges or identity-related issues, contact your bank and the provider support team, and consider professional financial advice if disputes escalate.